How to Choose and Assemble Your IKEA Wardrobe: The Complete Guide
So, you've just treated yourself to a new IKEA wardrobe? Excellent choice! But with so many ranges available, it’s not always easy to know which one is right for you. PAX, PLATSA, ELVARLI... each solution has its own unique strengths. This comprehensive guide will not only help you choose the ideal wardrobe for your space and needs but also show you how to assemble it without stress, step-by-step, just like a real pro. Get ready to transform your storage space into a place that’s as stylish as it is functional!

The IKEA Wardrobe Ranges: Which One to Choose?
Before you even think about screws and dowels, let's explore IKEA's star storage solutions to find the one that’s perfect for you.
PAX: The Ultra-Customisable, Made-to-Measure Solution
This is the most popular and flexible range. With PAX, you create the wardrobe of your dreams by choosing the dimensions, doors (hinged or sliding), and all the interior fittings (drawers, rails, trouser hangers...).
- Indicative Purchase Price: A basic frame starts at around €180.
- Approx. Pro Installation Price: Expect to pay around €200 per linear metre.
Pro Tip: Opt for glass-fronted drawers and integrated LED lighting. You'll get a perfect overview of your belongings, even at the very back of the wardrobe!
PLATSA: The Champion of Awkward Spaces
Attic rooms, under the stairs, or a wall with an unusual shape? PLATSA is the ultimate modular solution. Its frames of different sizes fit together like building blocks to adapt to any nook and cranny.
- Indicative Purchase Price: A basic module is available from just €150.
- Approx. Pro Installation Price: Around €150 per linear metre.
Pro Tip: Mix open and closed modules. Use fabric or wicker baskets in the open niches for storage that is both practical and decorative.
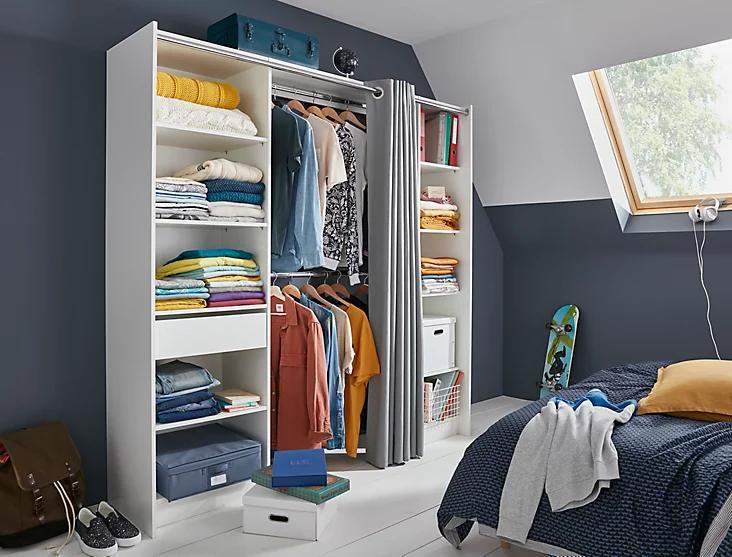
ELVARLI: The Elegance of Open-Plan Storage
Modern and airy, the ELVARLI system is perfect if you love to display your wardrobe. Fully modular with its posts, shelves, and rails, it offers easy access and a boutique look.
- Indicative Purchase Price: A starter module is priced at around €200.
- Approx. Pro Installation Price: Around €200 per linear metre.
Pro Tip: Use drawer dividers to organise your accessories (belts, scarves, etc.) and add a few stylish boxes on the shelves for items you want to keep hidden.
SKYTTA: The Sliding Door Solution
Already have an alcove or closet space you want to close off in style? SKYTTA is the range of sliding doors you need. Ideal for optimising space, it adapts to your dimensions and combines perfectly with PAX frames.
- Indicative Purchase Price: A pair of sliding doors starts at €220.
- Approx. Pro Installation Price: Around €250 per linear metre.
Pro Tip: Choose frosted glass doors to let light through while concealing the contents, creating a greater sense of space.
BOAXEL: Wall-Mounted Flexibility
BOAXEL is a highly flexible wall-mounted storage system. You fix the uprights to the wall and then simply click the shelves, rails, and baskets into place wherever you want them. It's the ideal solution for a laundry room, garage, or an open, evolving wardrobe.
- Indicative Purchase Price: A starter kit is available from just €100.
- Approx. Pro Installation Price: Expect to pay around €120 per linear metre.
Pro Tip: Maximise your vertical space! Don't hesitate to run the uprights all the way to the ceiling to store seasonal items at the top.
SMÅSTAD: The Kids' Wardrobe
Designed for children's bedrooms, the SMÅSTAD range is playful, sturdy, and practical. The furniture is built to their height, with clever storage solutions for toys and clothes.
- Indicative Purchase Price: A storage unit starts at €130.
- Approx. Pro Installation Price: Around €140 per linear metre.
Pro Tip: Use stickers or picture labels on the drawers and doors to help your child tidy up their things and become more independent.


What are the Installation Prices for IKEA Wardrobes?
| Wardrobe Range | Size | Avg. Purchase Price (€) | Prix Avg. Installation Price (€) (€) |
|---|---|---|---|
| PAX | 2 linear metres | 360 | 200 |
| PAX | 3 linear metres | 540 | 300 |
| PLATSA | 2 linear metres | 300 | 180 |
| PLATSA | 3 linear metres | 450 | 270 |
| ELVARLI | 2 linear metres | 400 | 200 |
| ELVARLI | 3 linear metres | 600 | 300 |
| SKYTTA | 2 linear metres | 440 | 220 |
| SKYTTA | 3 linear metres | 660 | 330 |
| BOAXEL | 2 linear metres | 200 | 120 |
| BOAXEL | 3 linear metres | 300 | 180 |
| SMÅSTAD | 2 linear metres | 260 | 140 |
| SMÅSTAD | 3 linear metres | 390 | 210 |
Preparation: The Key to a Successful Assembly
A well-prepared assembly is a job half done. Before you even unpack the boxes, take the time to follow these simple steps.
- Check Your Order: Make sure you have received all the packages for your order. The list can be found on your receipt. It’s a simple step that can save you a major headache later.
- Choose the Right Spot: Assemble your wardrobe in the room where it will be permanently located. Moving it once assembled can be very difficult and may risk damaging the structure.
- Protect Your Space: Ensure you have a large enough assembly area. Protect your floor with a blanket or the packaging cardboard to avoid scratches.
- Unpack and Organise: Open all the boxes and group similar parts together. Separate all the screws and hardware into small containers (bowls, yogurt pots...). This will save you a huge amount of time.
Pro Tip: Before you start, quickly vacuum the assembly area. Dust and small bits of grit can easily scratch the panels of your new wardrobe.

The Essential Tools for Assembling Your Wardrobe

The famous Allen key provided by IKEA is essential, but it’s often not enough. For a smooth and efficient assembly, we recommend having these tools on hand:
- A Phillips head screwdriver and a flat-head screwdriver (or an electric screwdriver set to a low torque).
- A hammer to tap in the wooden dowels and nail the back panel.
- A tape measure to check dimensions and ensure the frame is square.
- A spirit level to make sure your wardrobe is perfectly straight.
- A pencil to mark wall-fixing locations.
- A drill if you need to secure your wardrobe to the wall (highly recommended for safety).
Pro Tip: Use an electric screwdriver with caution. A torque setting that is too high can damage the particleboard panels. Always start on the lowest setting and increase gradually if needed.
The Step-by-Step Assembly: Just Follow the Guide!

The secret to IKEA instructions? They are entirely visual! Take your time to study each diagram carefully. One piece installed the wrong way round could force you to start all over again.
- Read the Manual First: Before touching a single screw, read through the entire assembly manual. This will give you a complete overview of the steps and help you anticipate key moments.
- Assemble the Structure: Start by building the wardrobe frame (sides, top, bottom). This is the foundation of your unit. Work on the floor for better stability.
- Check That it's Square: Before nailing the back panel, make sure your frame is perfectly square. To do this, measure the two diagonals: they must be identical. A square frame guarantees that your doors will hang correctly.
- Attach the Back Panel: This is a more important step than it looks. The back panel stabilises the entire structure. Don’t skimp on the number of nails you use.
- Lift the Unit Upright: Now is the time to ask for a helping hand! Lifting a wardrobe, especially a tall PAX model, is no easy task. Do it slowly to avoid putting stress on the joints.
- Install the Interior Fittings: Assemble the drawers, attach the rails, and position the shelves. This is the most satisfying part, where your wardrobe finally takes shape.
- Mount and Adjust the Doors: For hinged or sliding doors, follow the instructions precisely. Adjusting the hinges is the final step for a flawless finish. The adjustment screws allow you to alter the height, depth, and alignment of the doors.
Pro Tip: For the back panel, start by putting one nail in each corner, checking that the frame is still square, before nailing all the way around the perimeter.
Why Choose a Professional for Your IKEA Furniture Assembly?
By entrusting the assembly of your future wardrobe to a professional, you not only ensure a high-quality finish but also benefit from the safety and reliability that comes with an expert installation.
- Expertise and Advice: The professionals on NeedHelp have the necessary skills to assemble your IKEA purchases correctly and efficiently.
- Quality and Durability: Experts ensure that every installation is perfectly executed. This precision reduces the risk of future damage and wear.
- Guarantee and Insurance:* Professionals guarantee quality work and are insured in case of problems or defects. You are protected against property damage, offering you peace of mind during your project. *See terms and conditions
Frequently Asked Questions about IKEA Wardrobe Assembly
What tools are needed to assemble an IKEA wardrobe?
For a successful assembly, you should have at a minimum: a tape measure, a pencil, a spirit level, a screwdriver (Phillips and flat-head), a hammer, and a drill with bits suitable for your wall. A rubber mallet can also be very useful for fitting parts together without damaging them.
Is it possible to assemble an IKEA wardrobe alone?
Yes, it's possible, especially for smaller models. However, for large frames or tall structures, having two people is strongly recommended. It makes handling the large panels, lifting the frames, and securing the unit to the wall much safer and easier.
How do I securely fix my IKEA wardrobe to a plasterboard wall?
Securing the wardrobe is a crucial safety step. For a plasterboard (drywall) wall, use appropriate hollow-wall anchors, like Molly bolts. They expand behind the board and offer much greater pull-out resistance than standard plugs. If possible, locate the metal or wooden studs inside the wall and screw your fixings directly into them for the most secure hold.
What should I do if a part is missing or damaged?
Before you begin, check that you have all the parts by comparing them against the list in the manual. If a part is missing or damaged, contact IKEA's customer service. They will be able to provide the missing part or replace the faulty one. Keep your proof of purchase handy